1. Introduction
This tool is a web-based application that allows you to easily create a splash screen (boot screen) for the 128x64 resolution OLED display featured in the open-source gamepad firmware, GP2040-CE.
You can convert your favorite images into a boot screen with intuitive controls, without installing any special software on your PC.
This application processes everything in your browser. The splash screen you create will not be uploaded to any server.
2. Basic Steps
Here is the basic workflow from preparing an image to exporting it as a file readable by GP2040-CE.
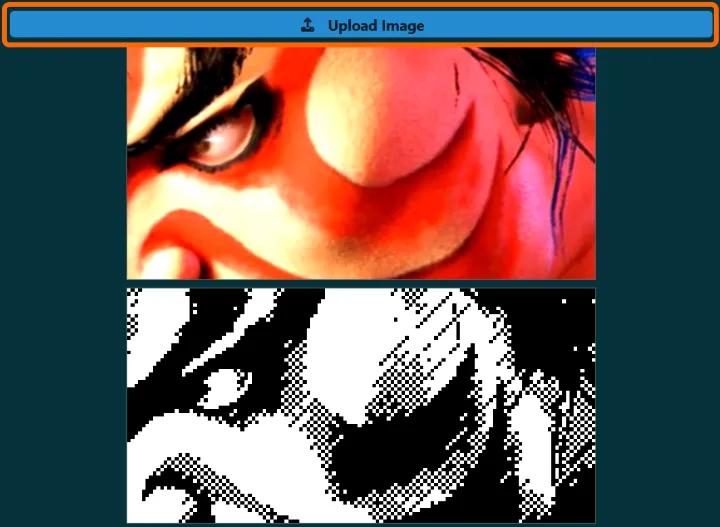
Step 1: Upload Image
Click the [ Upload Image] button in the upper-left corner to select the image you want to use for your boot screen (JPG, PNG, etc.). A preview of the original image and the binarized splash screen will be displayed.
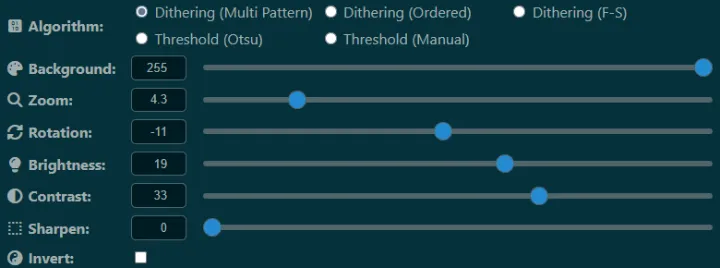
Step 2: Adjust Image
- You can change the image position by dragging the preview (either the original or the binarized image).
- Use the [ Zoom] and [ Rotation] sliders in the settings panel to adjust the image position.
- Modify settings like [Algorithm] and [ Brightness] in the settings panel to achieve your desired result.
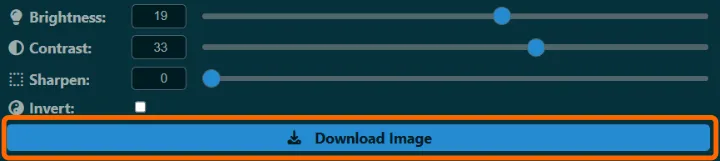
Step 3: Download Image
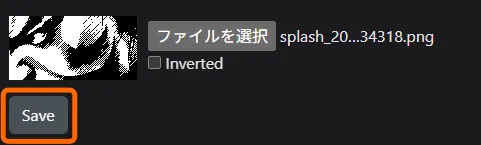
Once your design is complete, click the [ Download Image] button. An image file named “splash_YYYYMMDD_HHMMSS.png” will be downloaded. You can set this file as your boot screen by uploading it through the GP2040-CE web configurator.
Step 4: Configure on GP2040-CE (v0.7.12)
-
Unplug and plug in the USB cable while holding down the controller’s [Start] button.
-
Open http://192.168.7.1/ in your browser.
-
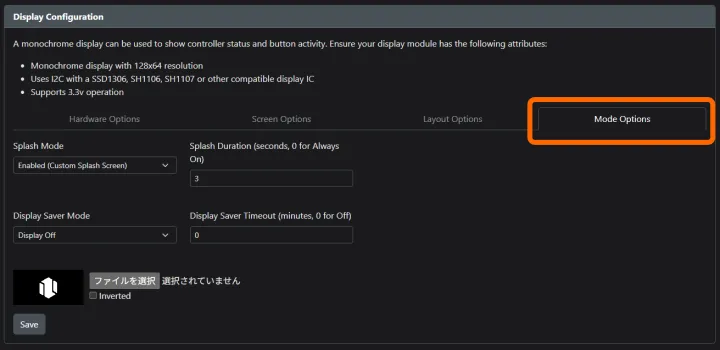
From the menu, click [Configuration]->[Display Configuration].

-
Click the [Mode Options] tab.
-
Click [Choose File] and specify the splash screen image you created.
-
Click [Save].
-
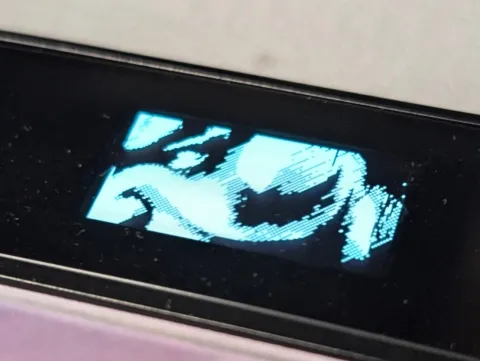
When you restart the controller, the configured splash screen will be displayed at boot.
3. Feature Descriptions
3.1. Image Adjustment Panel
This panel is for fine-tuning the image in the preview area. Each slider’s value can also be changed by numerical input.
- Background: Adjusts the background color for images with transparent parts.
- Zoom: Zooms the image in or out.
- Rotation: Rotates the image.
- Brightness: Adjusts the overall brightness of the image.
- Contrast: Adjusts the image’s contrast (the difference between light and dark).
- Sharpen: Sharpens the image, emphasizing its edges.
- Threshold: Adjusts the threshold when the binarization algorithm is set to [Threshold(Manual)].
- Invert: Inverts the black and white colors of the image.
3.2. Binarization Algorithms
This is the most crucial feature of the tool. “Binarization” is the process of representing a full-color image with just two colors, black and white. There are various methods, each with its own characteristics.
-
Original Image
Use the [ Brightness] and [ Contrast] sliders to make the light and dark areas distinct. (512x256px Actual)
 -
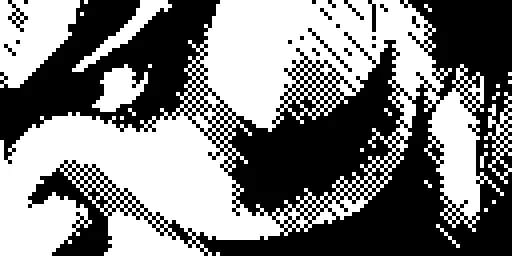
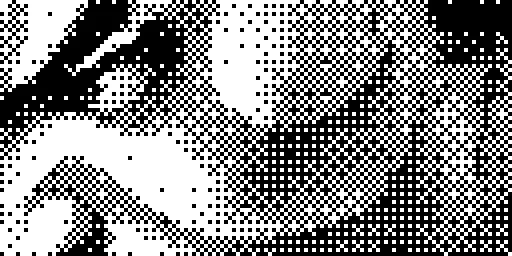
Dithering (Multi Pattern1):
A dithering method that applies different patterns based on pixel brightness. It can express a variety of textures for light and dark areas.
 (128x64 4x Scale)
 -
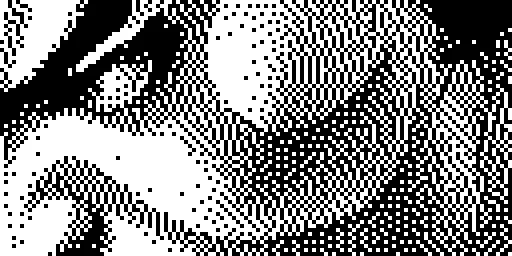
Dithering (Multi Pattern2):
Flipped version of Dithering (Multi Pattern1)
 (128x64 4x Scale)
 -
Dithering (Ordered):
Performs dithering using a fixed pattern (Bayer matrix). It is characterized by a uniform, grid-like pattern, reminiscent of retro computer graphics.
 (128x64 4x Scale)
 -
Dithering (F-S):
Known as Floyd-Steinberg, this is an error-diffusion dithering method. It distributes the quantization error of a pixel to its neighbors, generally producing more detailed and less patterned results.
 (128x64 4x Scale)
 -
Threshold (Otsu):
Also known as Otsu’s method, it automatically calculates an optimal threshold by analyzing the image’s histogram. It is ideal for images with a clear distinction between foreground and background.
 (128x64 4x Scale)
 -
Threshold (Manual):
Allows the user to set the threshold manually. Pixels darker than this threshold become black, and lighter pixels become white. It is effective when you want to control the cutoff point directly.
 (128x64 4x Scale)